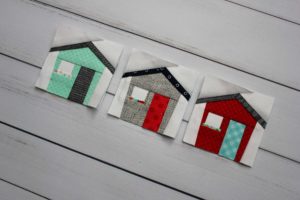
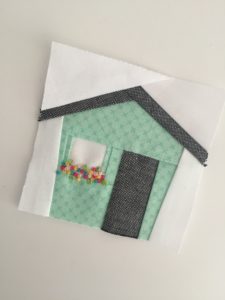
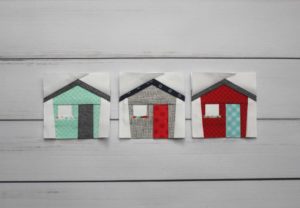
I’ve added a new tiny foundation paper pieced pattern to my collection! Tiny House was created a little by accident—I was actually making a different design and suddenly had the idea to do a super tiny house with a little flower box outside the window.

Tiny House is very beginner friendly (the pattern only has one section! 🙌) and it comes in two size options: 3” x 3” and 6” x 6” (these three tiny houses are the 3” size).

And to make that tiny flower box even cuter, I added some hand embroidered flowers onto the mint house! I used some of my favorite Aurifloss thread and french knots to quickly add some dimension to the tiny quilt block. It creates a big impact with just a little extra work. 🙂 For reference, the mint fabric is Kisses (in Sweet Mint) from Riley Blake Designs and the Aurifloss colors I used are: 2530 (Blossom Pink), 2423 (Baby Pink), 2888 (Fern Green), 1148 (Light Jade), and 2120 (Canary).

You can find the Tiny House foundation paper pieced quilt block pattern in my Etsy shop HERE.

Happy sewing!

This is a sponsored conversation written by me on behalf of Cricut. The opinions and text are all mine.

Almost exactly ten years ago, I purchased a Cricut Expression on Black Friday. I used it for a couple years to add some flair to my scrapbook pages and birthday invitations. I loved having it for my paper crafts, but as I did scrapbooking less and less, I decided to pass it on to someone else who would use it more. In the years since I’ve given it away, I’ve often thought it would be fun to have a computerized cutting machine again–and especially to try out the more specialized functions like cutting vinyl, iron-on vinyl, window cling, faux leather, and the new infusible ink. Can’t you just imagine all the cool craft projects you could create with the ability to intricately cut those types of materials?!?

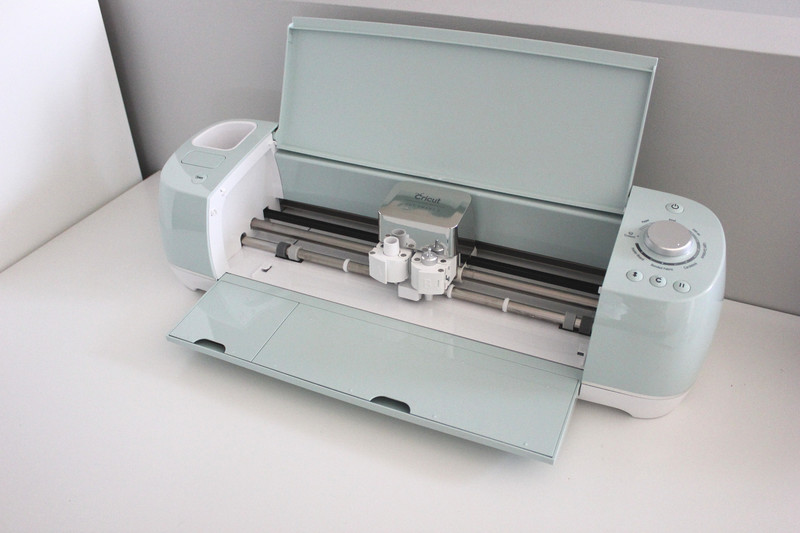
I figured over the course of ten years, things could change a whole lot in the realm of electronic cutting machines, and I was eager to try out the new Cricut Explore Air 2. Upon receiving my machine, the first thing I noticed was the color (I mean, I’m a quilter, so I’m allowed to be impressed by the color, right?). There are several color options and I got the gorgeous mint version–so pretty! There are also some handy storage compartments built into the machine to hold tools.

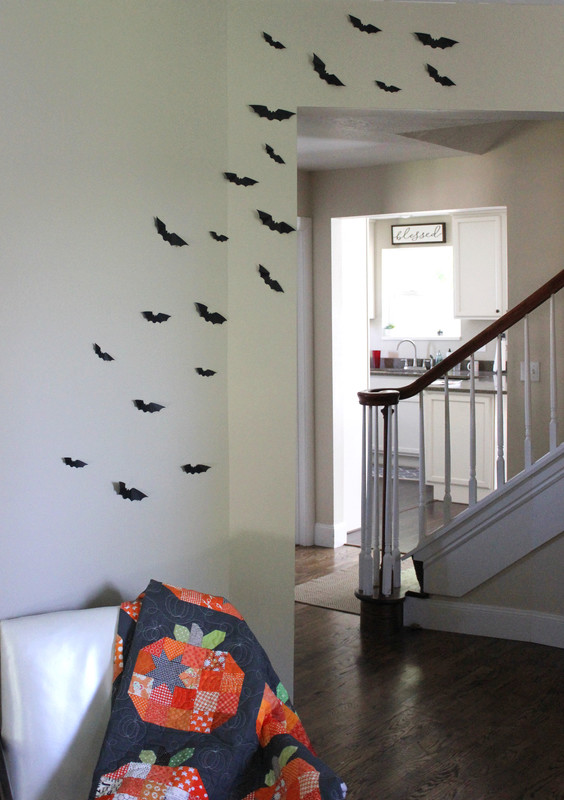
I wanted to immediately get cutting, so I turned to the Cricut Design Space to find a fun design. Just a warning: the Design Space has SO MANY fun designs. My list of items I wanted to make suddenly grew by about twenty. Haha. I ended up finding a fun bat design that would make some fast and fun Halloween decorations (the design I chose is called “Fancy Paper Pumpkins” if you want to find it on Design Space).

The Cricut Explore Air 2 easily connected to my laptop–I just plugged the Cricut cord into the USB port on my laptop and followed the instructions to pair them. I found out later that the Explore Air 2 has bluetooth capability, so you can bet that will be something I’m going to be trying out next! It will be so nice to just send the cutting files to the Cricut without having to connect them by a cord!

I only had 8.5″ x 11″ pieces of black cardstock, so I chose that option on the Design Space “Material Size” drop down menu and the bats from my chosen design automatically adjusted to fit onto an 8.5″ x 11″ piece of paper. For me, that feature is particularly impressive because with my old Cricut, I’d have to manually arrange the figures on the screen to make sure they fit within the size parameters of the cardstock I was using. With the Cricut Design Space, you can also easily adjust the number of figures to cut (copy and paste more figures, or delete to have less) and the size of the designs.

Cutting out the bat figures was a lot faster and smoother than with my old Cricut, too. I could tell the Explore Air 2 had a lot more power and it seemed to effortlessly cut the cardstock. The cut bat pieces were easy enough to remove from the mat, but I would suggest cutting everything you need from the cardstock/paper on the first run, as the left over cardstock ripped a little here and there taking it off of the adhesive mat.

The bat figures that I cut out had scored lines for their wings to help with bending in the right place. I haven’t purchased a scoring tool for my Cricut yet (it’s on my wish list, though), so instead of having the Cricut cut out the scored lines, I just used a ruler with a metal edge to bend the wings in the direction I wanted. Easy, peasy!


My kids helped me place the bats on our wall and they thought it was so fun to have a colony of bats invading our living room. And I thought it was so fun that the project took less than thirty minutes total!

Overall, I am super impressed with my Cricut Explore Air 2. This little bat project was a perfect starting off point and I’m more excited than ever to see what else it can do.


Every month, Aurifil gives a challenge to their Aurifil Artisans. This month, we were challenged to use Aurifloss or 12 wt Aurifil thread on a project. I use 50 wt Aurifil thread pretty much every time I sew, but am much less familiar with the thicker Aurifil options, so I was excited to gain a little experience with a different weight thread. 🧵

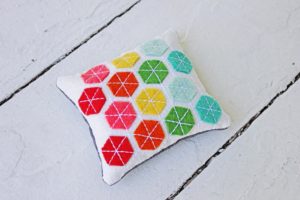
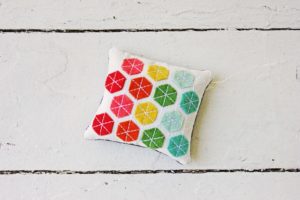
I decided to mix these yummy wool felt colors from Riley Blake Designs with 12 wt Aurifil to create a modern hexie pincushion (inspired by Modern Handcraft’s work). To be honest, I wasn’t quite sure how things would turn out, but I was pleasantly surprised by how easy it was to use the 12 wt thread! I kept my regular 50 wt Aurifil in the bobbin, kept the same needle and just lowered the tension a bit for the top thread.

The mix of the wool with the thicker stitching gives such a great texture! I’d love to experiment a bit more with wool + 12 wt Aurifil on another project, so don’t be surprised if you see more of this combination from me in the future.

We made it to the last week of the #fallingforfpp sew along on Instagram. I’ve had such a fun time seeing everyone’s blocks and hearing from quilters who have tried foundation paper piecing for the first time!

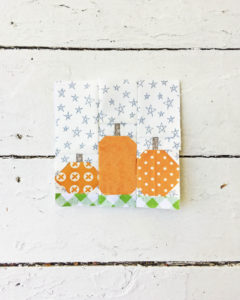
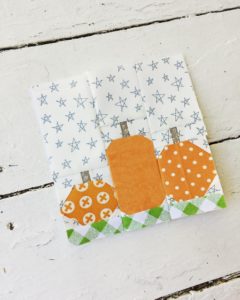
For the final week of September, I have one more free FPP block to share: Pumpkin Patch! This block is a little more advanced than the previous free patterns I’ve shared, and hopefully it will help you stretch your FPP skills a bit.

The Pumpkin Patch Foundation Paper Piecing Pattern comes with three size options: 3″ x 3″, 6″ x 6″, and 9″ x 9″. The photos here show the 6″ block pattern, but I’m hoping someone will try out the itty-bitty 3″ block pattern and share a photo with me. 🙂 

Click on the link below to download the Pumpkin Patch pattern.

Pumpkin Patch FPP Pattern

If you’re participating in the sew along on Instagram, remember to use the hashtag #fallingforfpp. We still have some pretty awesome prizes up for grabs, so I’m looking forward to seeing all of the FPP blocks that you make! 

Happy sewing!

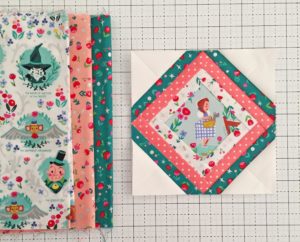
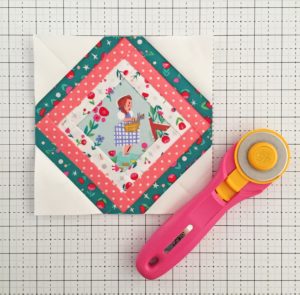
It’s week three in the #fallingforfpp sew along over on Instagram and I have another free foundation paper piecing pattern for you! The Mod Log Cabin quilt block pattern is beginner friendly and was designed with fussy cutting in mind–the on-point square in the middle is perfect for a focal print that you want to be the highlight of the block.

The Mod Log Cabin FPP pattern has two size options: 4″ x 4″ and 6″ x 6″. For my block, I used the 6″ block size and Dorothy’s Journey fabric line by Jill Howarth for Riley Blake Designs. I just love all the cute Wizard of Oz characters and the fussy cutting potential!

Click on the link below to download the PDF and have fun making your own Mod Log Cabin foundation paper piecing blocks!

Mod Log Cabin FPP Pattern


So you have a foundation paper pieced (FPP) pattern that you love, but it’s just not the right size for your project? Never fear–I’m going to give you all the info on how to adjust the size (shrink OR enlarge) your foundation paper pieced patterns so you can customize it to fit whatever project you’re working on!

Below, you can see my Tiny Log Cabin FPP block. The pattern comes with many size options (2″, 3″, 4″, 5″. and 6″) but what if you needed a different size? For example, if the project you were working on needed the Log Cabin block to be 7″ x 7″, you’ll need to enlarge the size of the pattern with a copier (or printer settings) to fit your needs.
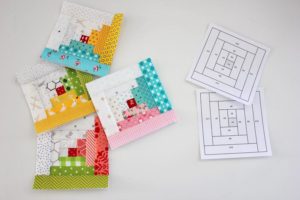
To change the size of a foundation paper piecing pattern, you’ll want to choose the Resize option on the copier and then you can change the enlargement or reduction value to what you need. 100% will be the original/starting size of your pattern. If you want to shrink it, you’ll choose a number below 100%, and if you are enlarging the pattern, you’ll choose a number above 100%.

For a simple enlargement, such as making a pattern 2 times the original size, the calculation is easy: 2x the original size is 2 x 100% = 200%. Or for half of the original size, the calculation would be: 1/2 x 100% = 50%.
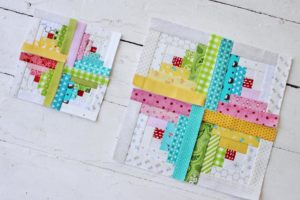
What if you’re wanting to do an enlargement or reduction that isn’t straight forward, though? If that’s the case, here’s the formula for you to use:
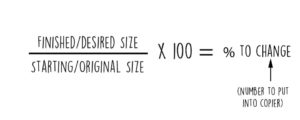
The finished/desired size is the size you want the pattern to end up being. The starting/original size is the size that the pattern started out as (these sizes are without the seam allowance!). Again, if you are wanting to enlarge the pattern, the “% to change” number should be larger than 100. If you are wanting to reduce the pattern, the “% to change” number should be less than 100.

If the percentage ends up being a number with a lot of decimals (e.g. 33.3333%), just round up to the nearest whole number (33.3333% —> 34%). That will make the pattern be just slightly larger (which is much easier to work with than pieces that are too small!).
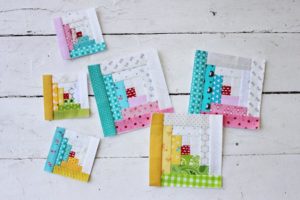
After figuring out the correct enlargement or reduction size, you can go ahead and make the copies! I would suggest checking the pattern size with a ruler to make sure it is in fact the size that you were aiming for (check the size of the block without the seam allowances).

After you have your copies, you’ll notice that the seam allowances are not an exact 1/4″ anymore. If you enlarged the pattern, the seam allowance will also be enlarged and you’ll need to draw a new line 1/4″ away from the edge of the pattern to bring it back to the correct size. If you reduced the pattern, the seam allowance will be smaller. You’ll need to adjust it so it’s up to 1/4″ in size.

Sometimes the original pattern pieces are really close together and after you reduce the pattern, there isn’t 1/4″ in between the pattern pieces to make the seam allowances correct. If that’s the case, you can either print out multiple copies of the pattern to make sure you get each piece cut correctly with the accurate 1/4″, or you can keep the pattern pieces as is with a smaller seam allowance and after assembling each piece, remember to trim the fabric to 1/4″ (which will be beyond the edge of the paper).
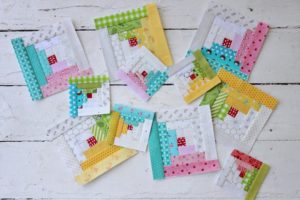
I hope that helps clear up any questions you might have on enlarging or reducing a paper pieced pattern! Please let me know in the comments if you need any clarifications or have any additional questions for me. Thanks and happy sewing!
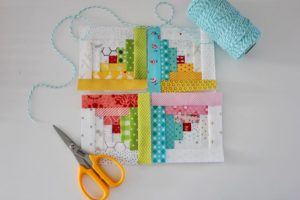
 

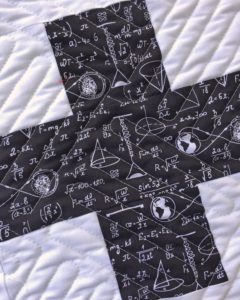
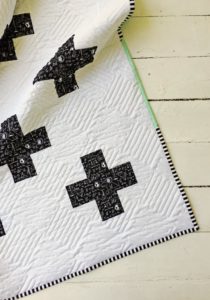
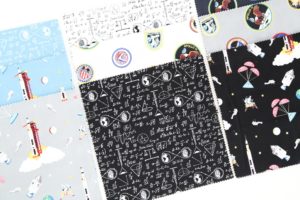
Sometimes you find a print that is so incredibly awesome that you have no choice but to design an entire quilt around it. This black astrophysics print is from the NASA Apollo 11 line by Riley Blake Designs and when I saw it, I knew I needed a quilt centered around this fun graphic fabric. 

Growing up, I was absolutely crazy about all things NASA. I loved science and even ended up getting a bachelor’s degree in Physics with dreams of possibly working for NASA someday. Over the years, I spent many years writing notes and solving problems with figures and equations that looked just like this print! So you can imagine how much I was geeking out over it.


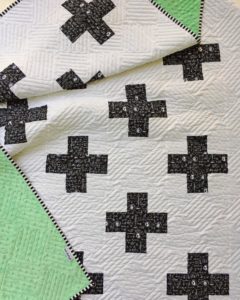
To highlight the astrophysics print. I decided to go with a simple, modern plus quilt. The background is Confetti Cotton Riley White and the backing is Riley Blake Dreamy Minky in Sweet Mint (such a beautiful color!).  The binding is my all-time favorite stripe–Riley Blake’s black and white 1/4″ stripe. I’ve used this exact stripe on too many projects to count! I wanted to tie in the Sweet Mint backing color to the front of the quilt, so I added a small stripe of Riley Blake’s Kisses, also in Sweet Mint (I love that they coordinate colors across different prints and fabrics–it makes it so easy to get an exact match!).

The bold graphic nature of this simple quilt really makes the plus shapes pop and the astrophysics print makes it all the more special. 🙂 

The NASA Apollo 11 line has several other fun prints, so if you have a science, math, or engineering nerd (I use that term fondly) in your life, you’ll definitely want to check this new fabric line out!

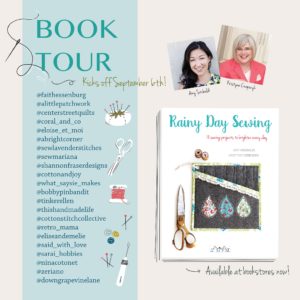
Welcome to my stop on the Rainy Day Sewing Book Tour! Rainy Day Sewing is the darling new book from Amy Sinibaldi and Kristyne Czepuryk. The book includes full instructions and colored graphics for a delightful range of objects: quilts, softie dolls, pouches, totes, and more. The photos are inspiring and the projects are full of charm.


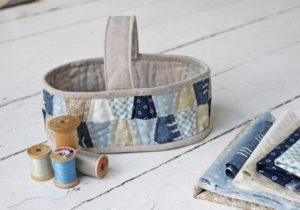
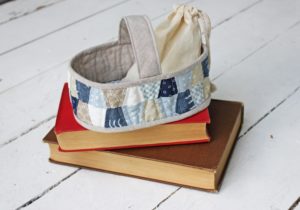
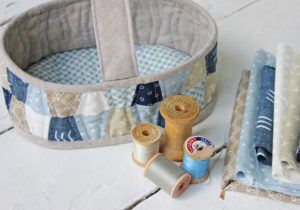
I seriously wanted to make all of the projects, but finally settled on the Thimble Basket. I fell in love with the tiny patchwork pieces on the side, hand-stitched binding, and the cute little handle. 


A bundle of blues, tans, and whites I recently purchased from Handmade is Heartmade was the perfect serene color palette and I just had to throw in some light blue plaid from Amy’s Les Petits line for the bottom of the basket.


My copy of Rainy Day Sewing is sure to get a lot of use–after all, there are still seventeen projects left for me to make! 😉

Faith Essenburg and Ange from A Little Patchwork have shared their Rainy Day Book Tour projects on their blogs and you can follow along with the other talented makers with the Book Tour Schedule below.


Happy Sewing!

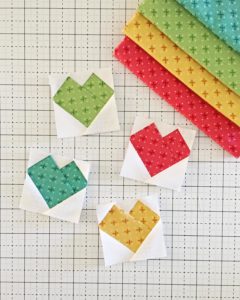
It’s been so much fun to see everyone who has been participating in the #fallingforfpp sew along over on instagram! I’ve seen a lot of Simple Heart FPP blocks–if you haven’t picked up that free pattern, head on over to the blog post HERE and download it! 

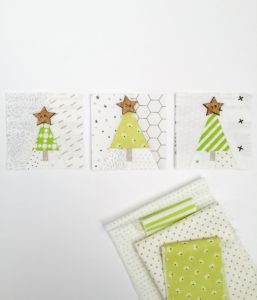
Today, I’m sharing a new foundation paper piecing pattern called Minimalist Trees. This cute pattern has three tree options-small, medium, and large-with two sizes for each tree (3″ x 3″ and 6″ x 6″). That’s six patterns total! And just like the Simple Heart block, the Minimalist Trees are super beginner friendly.

Minimalist Trees FPP Pattern by Center Street Quilts

Click on the link above to download the Minimalist Tree PDF Pattern and remember to post your photos on instagram using the hashtag #fallingforfpp so I can see them!


Have you tried foundation paper piecing (FPP) before? It’s such a fun method for piecing blocks that results in super accurate seams (and we all love accurate seams, right?). I also love that you can easily get angles and shapes that would be hard with traditional piecing. I absolutely love doing FPP projects and want to share that love with all of you!


Over on Instagram, I’m hosting a foundation paper piecing sew along throughout the month of September. This is the most low-key sew along ever! There’s not a specific pattern you need to choose– just pick any FPP pattern that you love. Throughout September, post in-progress photos, shots of your quilt block, or share a finished project that uses FPP and use the hashtag #fallingforfpp. There are (of course) prizes each week, so you’ll definitely want to be following along and start posting.

I’ll also be sharing videos with tips and tricks on instagram plus a new (and free) FPP quilt block once a week right here on my blog. In fact, you’ll find the first free FPP block pattern right here! Click on the link to download the Simple Heart PDF pattern. It’s a super easy, beginner friendly block to get you started.

Simple Heart FPP Pattern Download


Now start sewing and get sharing all your FPP creations on Instagram!