Welcome to the Foxboro Pouch Sew Along Day 2
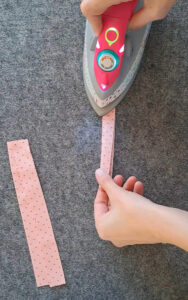
Today, we have a super simple assignment: preparing the Binding strips and Zipper Tabs. There are two types of bindings that you make in the Foxboro Pouch pattern. The Zipper Bindings are very straightforward (just press in half the long way). This method is called “double fold binding,” as it results in two layers of fabric covering the raw edge that you are binding. This method is a bit simpler to sew, and is a bit more durable, but does result in thicker seams that some machines might have a hard time sewing.
The End Bindings and Boxy Corner Bindings are made a bit different to lessen the bulk in the last few seams of the pouch. This will particularly help if your machine isn’t as powerful and struggles with thick seams. This method results in a “single fold binding” since there is just one layer of fabric covering the very edge that you are binding. Having just one layer on the edge results in a less durable binding, but for the inside of a pouch it will hold up just fine!

Note: the terms “single fold binding” and “double fold binding” refer to how many layers of fabric are covering the raw edge that you are binding. So although the “single fold binding” is prepared by folding and pressing more than once, there is only one layer of fabric covering the very edge of the surface we’re binding. Likewise, for a “double fold binding”, it is only pressed once, but there are two layers of fabric covering the raw edge of the surface we’re binding. The naming convention is a little confusing at first, but makes sense when you know what the name is describing. 🙂 There are also single and double fold bias tapes (often found pre-made in packages at big box stores and used for garment sewing), and from what I can tell, the nomenclature for bias tapes is completely different. No wonder we’re all so confused about single vs double fold! Haha!
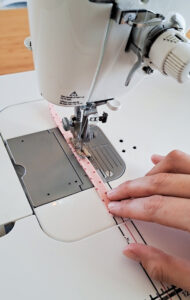
For the Zipper Tabs, follow the pressing directions then top stitch along both long sides of the fabric strip. Trim the strip into two pieces with the dimensions given. I like to pick the sections with my best top-stitching efforts and trim away the rest.

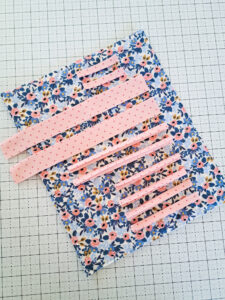
In the photo below, I have the small Zipper Tabs at the top, with the Zipper Bindings underneath, next are the End Bindings, and finally the Boxy Corner Bindings. These bindings are for the Large size Foxboro Pouch, so hopefully it will give you a good idea of the relative size that they should be.

Those are my tips for today! You can find the video that goes along with Day 2 of the sew along on my Instagram HERE.
Links for products from today’s tips:
Oliso Iron: click HERE
Wool Pressing Mat (I’ve used three different brands of wool pressing mats and they’ve all worked great! If you’re looking for one, I’d suggest finding a brand that has the size you want and then checking reviews). Here’s a link to one that I own: click HERE
Olfa Rotary Cutter: click HERE
Olfa Ruler: click HERE
Juki TL2000 Sewing Machine: click HERE
Organ 90/14 needles: click HERE
Thanks for following along!
Kristina
