Welcome to Day 5 of the Foxboro Pouch Sew Along!
We’ve made it to the end of the sew along! Today, I have a few last notes for cutting and sewing the boxy corners.
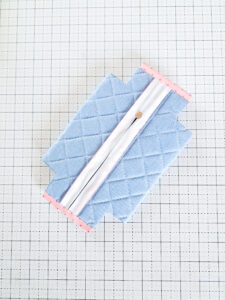
Using a ruler, mark the lines for the boxy corners according to the size you are making (the marked lines will be covered up with binding, so you don’t need to worry about making sure the lines are erased after).
Following the marked lines, carefully cut the corners of the quilted panel. Sharp fabric scissors work best for this step, as you’ll be cutting through multiple layers of fabric and batting/foam stabilizer.

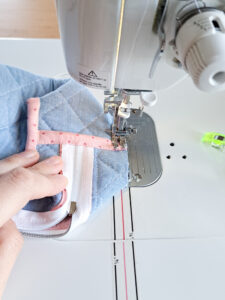
Open up the Boxy Corner, push the End Binding so it’s directed away from the zipper and sew the Boxy Corner closed with a ¼” seam. Sewing over the End Binding can be particularly thick–turning your machine’s handwheel might help get the needle through the layers.

Adding the Boxy Corner Bindings is also going to be a pretty thick seam across the End Binding area. A couple options if your machine just can’t handle the thickness:
*Try a jeans needle.
*Lessen the pressure on your presser foot (if your machine has that option).
*Before sewing on the binding, make a few more stitch lines through the boxy corner seam allowance area to really flatten it out.
* It might sound funny, but you can use a hammer or mallet to flatten out the seam! Hammer the layers-especially where the End Binding is-and your machine might be happier with it.

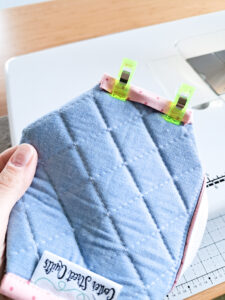
Once you attach a Boxy Corner Binding, wrap it around the raw edges of the Boxy Corner and tuck in the top and bottom edges of the Binding (I like to use Wonder Clips to keep my bindings in place while adjusting).
If you notice that the Binding is struggling to make it all the way around the seam (especially where it wraps around the bulky End Binding), you can take some sharp scissors and trim the End Binding area in the seam allowance a little smaller. I will often do this to give the Boxy Corner Bindings some extra space to cover the entire seam.
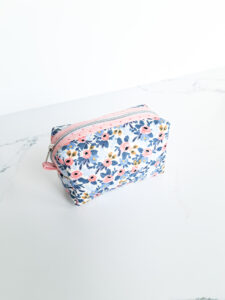
Once all four Boxy Corners are finished up, you can turn your pouch right side out through the zipper hole. I’ve found that the process of adding the Boxy Corner Bindings can crease the pouch a bit, so I will often press the pouch to smooth out any wrinkles. You can also press the edges of the pouch to give it more of a boxy shape if you’d like.

I have thoroughly enjoyed sewing along with all of you! It makes me so happy to see Foxboro Pouches popping up on my feed with comments about how fun the pattern was to make. Thank you for making this sew along wonderful!
Links for products from today’s post:
OLFA square ruler: click HERE
Frixion erasable pens: click HERE
Juki TL2000 Sewing Machine: click HERE
Organ 90/14 needles: click HERE
Wonder Clips: click HERE
Kristina

Ginger says:
Will there be a Day 5 Instagram post? I’m awaiting that to adhere the bindings.
Liz says:
Where do you buy that seam allowance strip that is on your sewing machine? Thanks so much. Love the pouch!
Jane Scupham says:
Thank you so much for a fun sew along during a snowy January! Lovely pouch!