Welcome to Day 4 of the Foxboro Pouch Sew Along!
Today’s assignment is to close up our pouches (with Zipper Tabs inserted!) and then add the End Bindings.
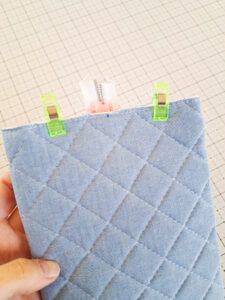
Before sewing up the ends of the pouch, make sure the panel is inside out, and fold the Zipper Tabs and insert them right where the pin/center mark and zipper teeth line up. The folded edge of the Zipper Tabs need to go in first, with the raw edges facing out of the ends of the pouch. I like to use binding clips (Wonder Clips) to hold everything in place while I sew the pouch ends closed. You can see in the photo below a tiny black mark (my center point I marked with an erasable Frixion pen). The mark lines up perfectly with the Zipper Tab and the zipper teeth, meaning they’re all centered correctly.

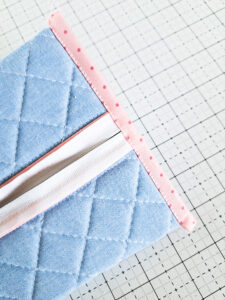
For the End Bindings, open up one End Binding and place the raw edge, right sides together, on the end of the panel. Sew with a ¼” seam (this seam will be just to the outside of the fold line).


Those are my tips for today! You can also find the video that goes along with Day 4 of the sew along on my instagram account HERE.
Links for products from today’s post:
Juki TL2000 Sewing Machine: click HERE
Organ 90/14 needles: click HERE
Wonder Clips: click HERE
Thanks for sewing along!
Kristina
