Today I’m sharing a super fast and fun tutorial: a small vinyl zipper pouch! These little pouches are perfect for storing tiny notions: think binding clips, mini charms, and small thread snips or small cosmetics like lip balm, mascara, and a compact mirror. Plus with only two items needed for each pouch, they are really affordable to make, too!
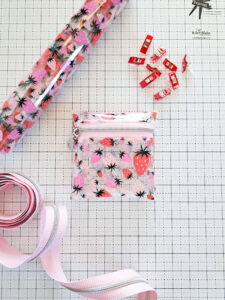
Before we get started, here are a few tips for working with vinyl:
- When vinyl is sewn through, the sewing machine needle makes a hole in it. Unlike sewing through cotton fabric, the puncture made in vinyl is permanent and easily visible if the thread needs to be taken out of the seam. For this reason, I always sew extra slow when sewing with vinyl so as to minimize the chance of having to redo any seams.
- For holding vinyl pieces in place, I frequently use Wonder Clips, but never pins, as the pins will put a permanent hole in the vinyl.
- Vinyl has a tendency to cling to certain surfaces, including your presser foot and needle plate, so you’ll want to make accommodations so the vinyl doesn’t stick to the presser foot. I use either a non-stick presser foot (HERE’s the one that I have for my Juki), or small strips of thin paper in between the vinyl and presser foot. The paper will keep the vinyl from sticking to the presser foot and you can sew right through it then gently tear the paper away after finishing the seam. I used the paper strips method for years before finally purchasing a non-stick presser foot. You can also use a piece of paper under the vinyl to keep it from sticking to your machine bed.
All of the instructions for sewing the small vinyl zipper pouch are below, but I’ve also shared a short video on my Instagram account that you can watch the process, too. You can find that video HERE.
Let’s get to the pouch tutorial!
Small Vinyl Zipper Pouch Tutorial
Finished Size: 5″ x 5″
Supplies Needed
6″ x 10″ piece of vinyl (I’d recommend between 12 and 20 gauge or 0.3-0.5 mm thickness)
10″ long zipper
Note: For the pouch in this tutorial, all supplies are from the online shop Zipper Valley.
1. Lay out your piece of vinyl (6″ wide and 10″ tall) with the zipper at the top above one of the 6″ sides. The zipper should open on the left.
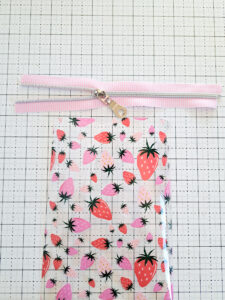
2. Flip the zipper so it’s on top of the vinyl, right sides together. The 10″ long zipper sides will overhang the 6″ width of the vinyl on each side.
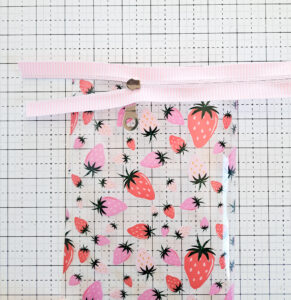
3. Sew the zipper to the vinyl with a 1/4″ seam allowance.
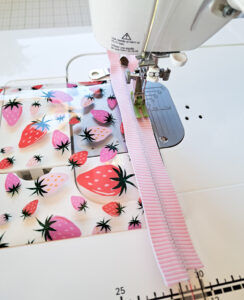
4. Turn the vinyl to the front side and bend the tiny strip of vinyl in the seam allowance back on itself (wrong sides together) so the zipper tape lays flat. Top stitch along the edge of the vinyl by the zipper tape, catching the vinyl in the seam allowance underneath. This top stitch edge will keep the vinyl and zipper tape from the seam allowance out of the way of the zipper.
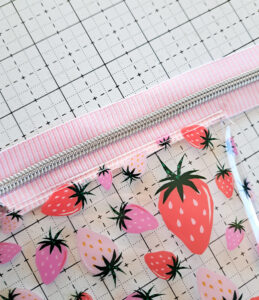
5. Wrap the other 6″ end of the vinyl up to the other side of the zipper tape, so the right side of the vinyl is facing the right side of the zipper (the wrong side of the vinyl will be facing outward and the right side of the vinyl will be facing in). Sew the vinyl and zipper together with a 1/4″ seam.
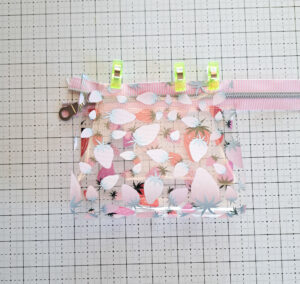
6. Turn the vinyl right side out, open the zipper as far as you can and top stitch the edge of the vinyl as you did in Step 4.
7. Turn the vinyl wrong side out and orient the zipper so it is approximately 1″ to 1 1/2″ down from the top fold of the vinyl, as shown in the photo below. Clip the sides to hold into place and sew up both sides of the pouch with a 1/2″ seam. When sewing over the zipper teeth, backstitch several times to secure, as this will be an area of high stress when turning the pouch right side out.
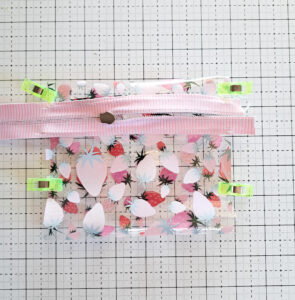
8. Trim any excess zipper length that hangs past the edge of the vinyl.
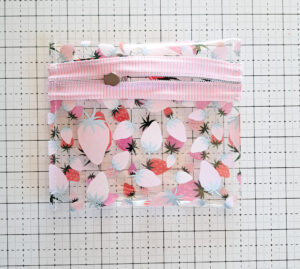
9. Turn the vinyl pouch right side out through the zipper opening. Tip: the hot air from a hair dryer can help the vinyl be more pliable and easier to turn right side out.
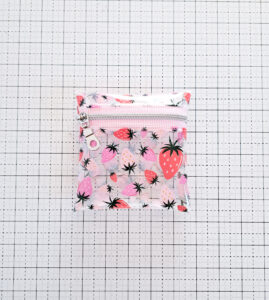
These cute little pouches can, of course, be made in different sizes to fit your needs. Although, be aware that the smaller the size, and the thicker the vinyl, the harder it will be to turn the pouch right side out.
Remember, you can watch the video of the small vinyl zipper pouch on my instagram account HERE.
Happy sewing!
Kristina

linda says:
Such a cute simple project. A perfect idea for my 12 year old granddaughters this Christmas season. I bought them both their first Sewing machines this Christmas. Thank you for sharing your tutorial. It will be a hit with my girls.
centerstreetquilts says:
You’re welcome! I’m so glad the tutorial will be useful!
Dale Bergman says:
Thank you for the tutorial!! I found the bag super easy to make. I will make more for little gifts. 🎁
centerstreetquilts says:
I’m so glad you enjoyed the tutorial!!
Shelly says:
Hi Kristina, can you tell me where you get your vinyl for these cute pouches? Thanks for the tutorial. 🥰
centerstreetquilts says:
Hi Shelly,
Most of my printed or colored vinyl is from Zipper Valley. They have a fun assortment of vinyl options.
Carolyn says:
Many thanks! They are so cute and perfect for my next sewing obsession!
centerstreetquilts says:
You’re welcome!
Helen says:
What size zipper are you using in this project? Very cute pouch for sure! I’ve tried sewing vinyl awhile ago but didn’t go as planned. But will give this pattern a try with a non-stick presser foot. Thank you for sharing your tutorial 🧵🧵
centerstreetquilts says:
Hi Helen, I used a size #5 zipper for this pouch, but it will work well with a standard size #3 zipper, too.
Judy says:
Hi. Where do you get your vinyl. Is it jelly vinyl?
Thank you.
centerstreetquilts says:
Hi Judy, I got this vinyl from Zipper Valley, although it seems to be out of stock now. It’s not jelly vinyl, but I have sewn with jelly vinyl and really liked that, too. There are several other stores that carry similar clear printed vinyl. Check out Sew Hungry Hippie and IdleBlooms, as they both have some fun vinyl options.
Michelle says:
I’ve made 13 so far. 10 vinyl and 3 woven cotton with batting. Such a cute gift. Can’t wait to make some with the valentine vinyl that arrived today.
Kathleen says:
I love these pouches! However, this is my first try with vinyl. I’ve tried the paper trick but I’m having trouble with birds nesting all along the underneath of the seam. My machine is sewing perfectly fine on cotton. Any suggestions?
centerstreetquilts says:
Hi Kathleen,
You could try tightening the tension on the upper thread–that might help even out the tension.
Kristen says:
Thanks for the tutorial! I just made one (and am tagging you in my Instagram post on it). The corners were a bit hard to turn even with the hair dryer softening the vinyl and I notice you didn’t say to clip the corners so I didn’t. I used a blunt turning tool but was still a bit worried I’d poke through. Any tips for those pesky corners?