It seems like everything that I’ve been sewing lately has been tiny. I guess I’m just really enjoying the fast and easy projects lately! Today, I’m sharing a new tutorial for you: the Tiny Circle Zipper Pouch!
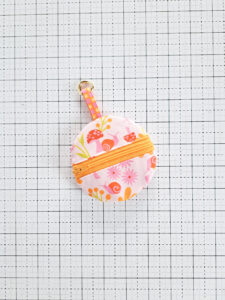
These little pouches sure are tiny, but they are perfect for holding lip balm, hair ties, small earphones, or loose change and bills.
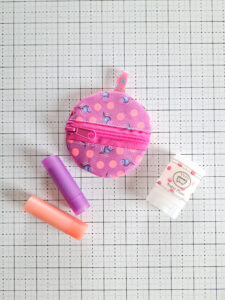
You can quickly make one of your own (or to give as a gift!) with just a few supplies! Let’s get going on the tutorial:
Tiny Circle Zipper Pouch
Supply Requirements:
Fabric: (4) 5″ x 5″ squares + (1) 1 1/2″ x 3″ strip
Fusible Interfacing (optional): (2) 4 3/4″ x 4 3/4″ squares
Zipper: 8″ or longer zipper (a longer zipper can always be cut down). I recommend a standard size #3 nylon (plastic teeth) zipper
Hardware (optional): 1/2″ D ring or 1/2″ swivel hook for hang tab
Circle Template: You can download and print my 4 1/2″ diameter circle template here: Center Street Quilts Circle Pouch Template, or use a circle ruler or circular object you have at home that is a similar size.
Note: from the fabric requirements, two of the 5″ squares will be for the outside of the zipper pouch (referred to as Main fabric), the other two 5″ squares will be for the inside of the zipper pouch (referred to as the Lining fabric), and the 1 1/2″ x 3″ strip will be for the hang tab.
1. From the (4) 5″ x 5″ squares, pick two to be the Main fabric (outside of the zipper pouch) and two to be the Lining fabric (inside of the zipper pouch). If using fusible interfacing, follow the manufacturer’s instructions to fuse the interfacing to the wrong side of the two Main fabric pieces.
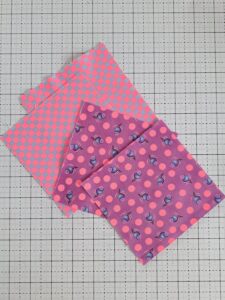
2. Take one of the Main fabric squares and one of the Lining fabric squares and cut each in half one way to yield two pieces, each 5″ wide by 2 1/2″.
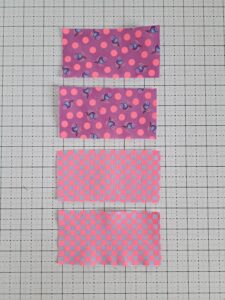
3. Place the zipper right side up and sandwich it between a 5″ x 2 1/2″ Lining piece on the bottom and a 5″ x 2 1/2″ Main fabric piece on the top, with both fabric pieces facing in toward each other and the zipper. Align the bottom edges as shown below in the photo.
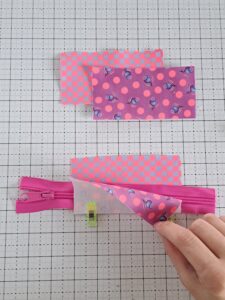
4. Sew the three layers (Lining, zipper, and Main) together along the edge.
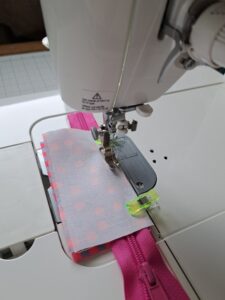
5. Flip the Main and Lining fabric pieces away from the zipper (press if needed, but avoid touching the iron to the plastic zipper teeth!) and top stitch along the edge of the fabric to hold it in place and away from the zipper.
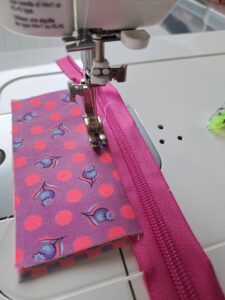
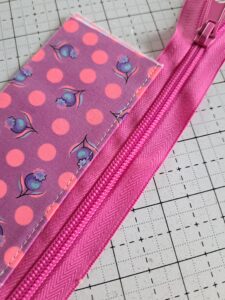
6. Repeat with the remaining two 5″ x 2 1/2″ fabric pieces, by placing the zipper right side up sandwiched with the fabric pieces. The Lining will be on the bottom and the Main fabric on the top, both facing in toward the zipper as shown below.
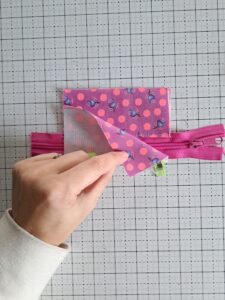
7. Attach the layers together, then flip the Main and Lining away from the zipper and top stitch along the edge of the Main fabric.
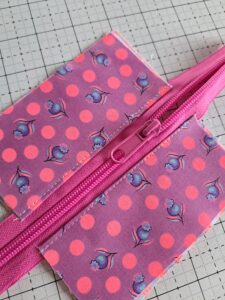
8. Place a circle template with a 4 1/2″ diameter on top of the fabric + zipper (you can find my printable template here: Center Street Quilts Circle Pouch Template). Move the zipper pull to the center of the zipper (so it doesn’t get cut off!). Trace the circle template onto the fabric then cut out the circle shape to create the Zipper Circle. As you cut over the zipper teeth, use a pair of utility scissors so as to not dull your fabric scissors.

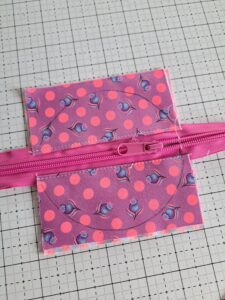
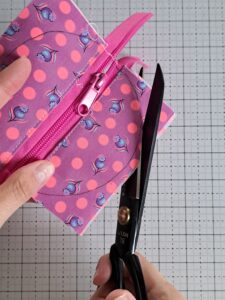
9. Use the circle template to cut circles from the remaining two 5″ x 5″ fabric squares (one Lining and one Main).
10. Fold the 1 1/2″ x 3″ strip in half the long way and press to make a strip 3/4″ x 3″. Unfold and fold the long sides into the pressed line and press. Refold at original line and top stitch the skinny strip along both long edges.
11. If using a D ring or swivel hook, place it on the hang tab. Fold the hang tab in half to make a loop and place the raw ends at the top, center spot of the Zipper Circle. Attach with a 1/8″ seam.
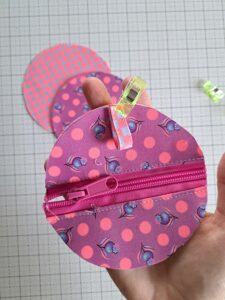
12. Place the Main fabric circle on top of the Zipper Circle, right sides together, as shown below. Clip or pin to hold into place, then sew around the entire circle with a 1/4″ seam. Backstitch a couple times over the zipper teeth (if the zipper teeth are plastic, you can sew right over them!) to really secure the seam there, as it will be a point of stress when the pouch is turned right side out.
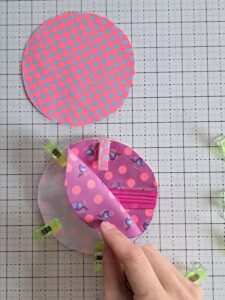
13. Flip the Zipper Circle so the Lining side is up (you will be looking at the wrong side of the zipper. Place the remaining Lining fabric circle piece right sides together on top of the Zipper Circle as shown below.
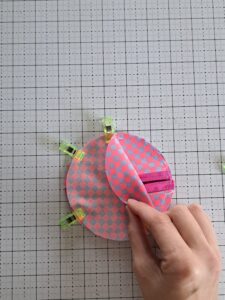
14. Sew around most of the circle with a 1/4″ seam, leaving about a 2″ opening (to turn the pouch right side out). I like to place the opening on the bottom part of the circle so the opening isn’t across either of the zipper ends or the hang tab.

15. Using the opening, flip the pouch through the hole so the Lining side is facing out. Fold the raw edges at the opening in towards each other and clip or pin in place. Using a spray bottle can make these pieces a bit more pliable and an iron can also be useful to get them to bend the right way.
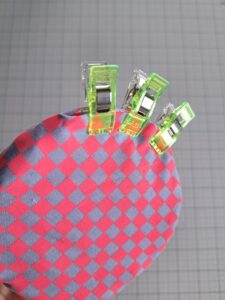
16. Close the opening either by machine or hand stitching (my preferred method, as it tends to result in a nicer looking finish). Turn the pouch right side out through the zipper so the Main fabric is on the outside. Use a point turner or a blunt stick to get all of the edges turned out nice and sharp (an iron can also help with any wrinkles that formed while turning the pouch right side out).
17. Fill your Tiny Circle Zipper Pouch with your favorite tiniest objects and enjoy!
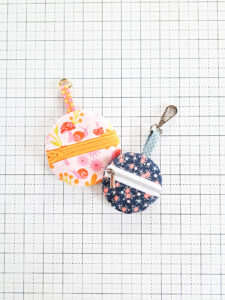
The Tiny Circle Zipper Pouch can be adjusted in size (just use a different size circle template!), but I’d suggest not going smaller than a 3 1/2″ diameter circle template. Anything smaller gets a bit ridiculous to sew and turn right side out, plus not much would fit in that small of a pouch anyway (although, it sure would be cute!).
Thanks for following along on today’s tutorial! You can watch a short video tutorial of the Tiny Circle Zipper Pouch on my instagram account HERE.
Happy sewing!
Kristina

Karen says:
Thank you! Can’t wait to try
Rina says:
Thank you very much! It’s an easy last minute gift 🎁! I really appreciate your kindness 🤗
JoAnn Watson says:
Thank you. I’ve made several of your items and I love your sew alongs. It really helps someone who is learning to sew patterns. Happy Holidays!
Nancy Bauman says:
Love love it!
Colleen Rayner says:
Thank you for this great little project. I made one yesterday and it went together so well and was just fun sewing/project making. I wish I had time to make a dozen more . I have several of your patterns and they are just as good.
Merry Christmas and all the best to you and yours !
Denise says:
Wow your tutorial makes me feel like I can actually do this!